Create Offline Raster & Vector Maps
OsmAndMapCreator
OsmAndMapCreator can be used to create any maps supported by OsmAnd yourself. You can download latest version from website. OsmAndMapCreator has UI capabilities to create raster & vector maps. To create vector map you will need OSM file (`.pbf, .osm.gz, .osm.bz2)* and *to create online sqlite map file you will need a base tile url`*.
Raster maps (simple)
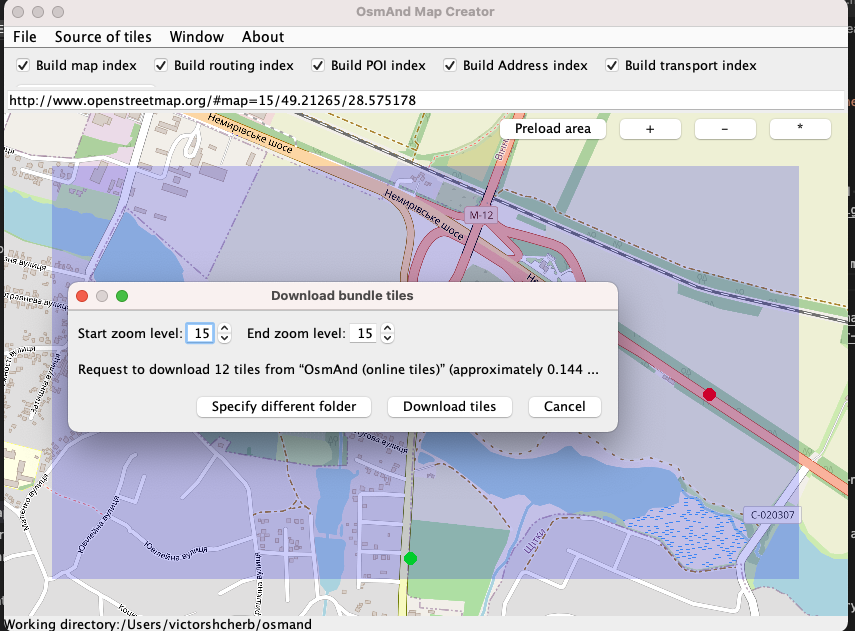
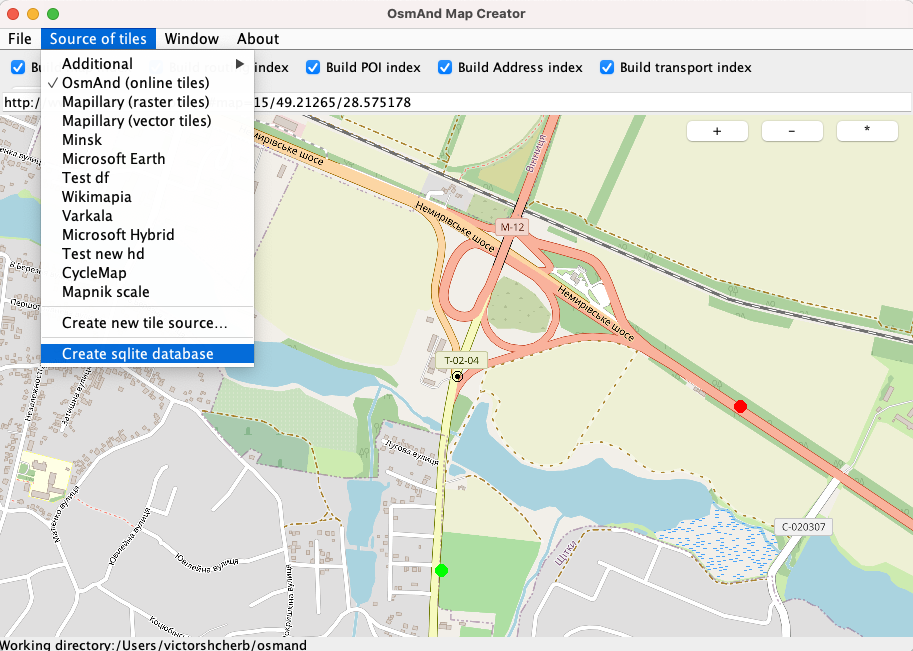
Once you have selected the tiles from which you want to create a map in the Source of tiles menu and they have been successfully loaded into OsmAndMapCreator, you can right-click on the area you want to preload. After that you can create .sqlitedb file in Source of tiles → Create sqlite database.
To create a vector map you will need an OSM file (.pbf, .osm.gz, *.osm.bz2) and to create an online sqlite map you will need the url of the base tile.
Vector maps (simple)
Steps to create vector map via OsmAndMapCreator UI:
- OSM File
- Download it from Geofabrik or small export from OpenStreetMap
- Convert Shapefile to OSM
- Generate OSM XML it yourself using any programming utilities, you can proceed by converting it to OBF Format which OsmAnd can undertand
- Select checkboxes whether you want to produce Maps including Address / Routing / Transport / Map data
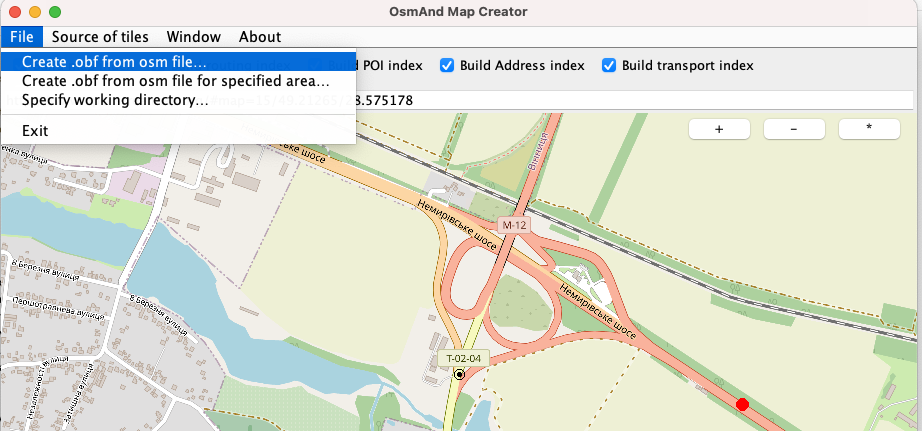
- Select in File → Create .obf from file.
- Once process is completed you will have
.obffile in the working directory.
More parameters how to generate vector maps could be specified in the shell utilities.sh .
Vector maps (shell script)
The most typical & the most powerful way to create maps used by developers is via shell script utilities.sh packaged within OsmAndMapCreator. It also has many other utilities methods to create some custom maps such as basemap or map with region names & boundaries (regions.ocbf).
Example script:
wget -N http://download.osmand.net/latest-night-build/OsmAndMapCreator-main.zip
wget  https://creator.osmand.net/osm-extract/albania_europe/albania_europe.pbf
unzip OsmAndMapCreator-main.zip -d OsmAndMapCreator
OsmAndMapCreator/utilities.sh generate-poi albania_europe.pbf --chars-build-poi-nameindex=3
Generation script takes only 1 file OSM file to process at a time (.pbf, .osm.gz, osm.bz2, .osm) and many optional parameters specified as --xxxxxx.
| Main command | Description |
|---|---|
generate-obf | Generates full obf with map, address, poi, transport, routing information |
generate-obf-no-address | Generates full obf but without address information |
generate-address | Generates map with only address information |
generate-poi | Generates map with only poi information |
generate-map | Generates map with only map rendering information |
generate-roads | Generates map with only routing information |
All extra parameters could be found in the code in case they are not documented properly Main Utilities. All parameters are optional!
| Parameters | Description |
|---|---|
--add-region-tags | Slows down map creation process by adding to each way a region name tag where it processed. It's needed only for worldwide basemap or when you process multinational regions, in all other cases it's easier to have proper name for your file i.e. germany... , us.... If you don't have this parameter and you don't specify add this parameter, it's likely you will see non-localized road / public transport route badges in OsmAnd. |
--keep-only-sea-objects | Removes object that are not part of ocean / see, it's used to produce nautical map |
--ram-process | Specifies that creation will be using RAM SQlite DB instead of disk - more information. |
--srtm=<FOLDER> | Specifies folder with TIF-DEM images, so information about height & slope will be encoded into roads |
--rendering-types=<FILE> | rendering_types.xml location with rules & OSM tags needs to be encoded in OBF - more information. |
--poi-types=<FILE> | poi_types.xml location with rules & OSM tags needs to be encoded in OBF for POI - more information. |
--extra-relations=<FILE> | OSM file with polygons like Low Emission Zones which tags should be propagated to the ways. |
Note: Creating maps with batch.xml is deprecated, please use shell methods mentionned above and combine with downloads / for cycles using standard shell script capabilities.
RAM to process maps
Creating maps is memory hungry and I/O intensive. In other words: it takes very long and could run out of memory! Please check generation on small maps first. In order to give more memory to JVM, you can declare env JAVA_OPTS variable.
export JAVA_OPTS="-Xms256M -Xmx6400M"
OsmAndMapCreator/utilities.sh generate-obf ....
What can you do to improve performance:
- Use SSD disks.
- Use multiple disks.
- Use "in memory" processing.
If you want to avoid using disk space and use only RAM to speed up process - specify
--ram-processparameter. This "in memory" processing will speed up the map generation by 10-50%, but requires a lot of memory. 10% to 50% depends on the map size. Smaller maps benefit less from in memory processing than larger maps, as disk access for initial reading and final map writing plays a bigger role, while larger maps require more "calculation".
In normal "on disk" processing a nodes.tmp.odb file is created from your .osm or .osm.pbf file. This nodes.tmp.odb file is a sqlite database file and it is about 15 to 25 times as big as the original .osm.pbf file which you downloaded from geofabrik.de. So if your original .osm.pbf file is 300MB, your nodes.tmp.odb file will be 5GB to 6GB! Note that smaller maps will be around the 15x factor whereas big maps (>350MB) will end up in the 20x to 25X space increase.
With "in memory" processing this nodes.tmp.odb file will be created in your working memory. You will need "the size of the nodes.tmp.odb" + 20-25%. Please note that that you don't need to increase -Xmx parameter cause SQLite in memory won't occupy JVM memory and use only native operating memory.
Example: for a 250MB .osm.pbf a ~4.5GB nodes.tmp.odb file will be generated.
Custom vector map (tags)
OsmAnd rendering and POI search relies on information written to OBF. It has different structure than other OSM formats and optimized for mobile usage. You can inspect the contents using Binary Inspector. 3 Most important parts of OBF file are
- Map section used for Map Rendering defined by Rendering types
- POI section used for POI search and Object information defined by POI types
- Routing section used for Routing defined by Routing types - same file as rendering types but has own section
<category name="routing"> - routing_type.
rendering_types.xml and poi_types.xml could be overridden during map creation process in OsmAndMapCreator UI settings or as command line parameters --rendering-types=<path>, --poi-types==<path> to utilities.sh generate-obf (packaged with OsmAndMapCreator).
- Main map object type (
<type tag="abandoned:highway" value="track" minzoom="13"/>) is registered per OSM entity (node or way or multipolygon). There could be many main types registered per 1 entity (i.e. road + tram + route_bus), tagorderwill sort types within entity. - Additional map object type (
<type tag="service" value="driveway" minzoom="13" additional="true"/>) is additional information attached for OSM entity, so in case OSM entity is not registered with main type it won't be stored inside OBF. Usually it stores information to display extra features like color, smoothness. - Text map object type (
<type tag="int_ref" additional="text" minzoom="1" order="32"/>), stores text information about object so it could be later displayed on the map. entity_convertrepresents simple tag transformation scripts (<entity_convert pattern="tag_transform" from_tag="bridge" if_tag1="highway" if_value1="proposed" routing="no"/>). It is often used to combine tags into specific types, so it's easier to display with custom rendering style. Also it allows to give region specific tag transformation and allows to have different features rendering per country.- Relation tag propagation. OsmAnd doesn't index relation objects (except multipolygons - stored as area objects) but it allows to propagate, push tags from relation onto members. Obviously 1 member could have multiple parent relations and tags conflicts are possible. OsmAnd supports 3 ways to deal with conflicts:
- combine all tags as long comma-separated line (good for rendering bus route names as a long string on the way -
nameTags,namePrefix). - sort values and keep the highest value (good for rendering routes local vs international -
relationGroupSort,additionalTags,additionalNamePrefix). - generates unique tags for each relation (not used for now but stores information without loss -
relationGroupNameTags,relationGroupAdditionalTags,relationGroupPrefix). More information you can find in Rendering types.
- combine all tags as long comma-separated line (good for rendering bus route names as a long string on the way -
Read more: usually custom vector maps combined with custom rendering style.
Raster maps (advanced)
OSM is a large database for maps, but it doesn't always have the information you need (for example, about deserts). Sometimes you can get the information you need from other sources, such as paper maps or satellite images.
There are special programs for preparation, conversion, calibration of any source maps (maps in image format, pdf-format, raster online maps) into OsmAnd online maps.
About some of them below.
MOBAC
Mobile Atlas Creator (MOBAC) is an open source (GPL) program for creating offline atlases. Mobile Atlas Creator can use a large number of different online maps, such as OpenStreetMap and other map providers, as a source for creating an offline atlas.
Just download the program, then run it.
In the format choosing dialogue pick OsmAnd SQLite or OsmAnd tile storage. SQLite is a single file with the selected area while tiles are separate pieces of the map gathered on your device. SQLite often happens to be more convenient as it is stored in one place and occupies less storage space.
Pick the map source, zoom levels, and other features. Select an area, then choose the menu Selection -> Add selection.
After that, you can create your SQLite file: 'Atlas' -> 'Create Atlas'.
MAPC2MAPC
MAPC2MAPC is a Windows program to manipulate digital maps and convert them between different platforms and software.
For example, you can convert and calibrate any image format & pdf maps to OsmAnd online map.
Video tutorial of using the program.
SASPlanet
SASPlanet is a freeware, opensource navigation software with the capability of viewing and downloading maps and satellite images of Earth from various on-line services to OsmAnd online map.
Download the program, English guideline.
Geolocated PDF or TIFF
How to convert geolocated pdf/tif/tiff files to OsmAnd SQLitedb in Windows. Georeferencing tif/tiff and pdf files can be fairly simply done in QGIS.
- Install and run OSGeo4W
OSGeo4W is a binary distribution of a broad set of open source geospatial software for Windows. It includes QGIS, GDAL/OGR, GRASS as well as many other packages (over 150). Download and run OSGeo4W network installer.
Now, from Start menu, run OSGeo4W Shell. It should start in the default C:\OSGeo4W directory. Either navigate to your work folder (or you could just use C:\OSGeo4W for this purpose).
- Convert tif/pdf to mbtiles
To convert tif/pdf to mbtiles run (replacing tif/pdf and mbtiles file names where necessary):
gdal_translate -co "ZLEVEL=9" -of mbtiles map_1.tif map_1.mbtiles --config gdal_pdf_dpi 600
gdaladdo -r nearest map_1.mbtiles
The first command lets GDAL figure out the max zoom it can generate based on the image resolution. And converts tif/pdf file to mbtiles with specified DPI. Feel free to play around with this setting, but be careful as high DPI values will make the conversion process very long and the resulting file size very big.
The second command lets GDAL figure out and generate the lesser zoom levels based on the max zoom level that already exists. It's not uncommon for those two commands to take a while to complete.
- Install Python from the Microsoft Store
Probably the easiest way is to head to Microsoft Store.
If, while trying to execute Python script in the next step, this error occurs:
Traceback (most recent call last):
File <console>, line 1, in <module>
ImportError: No module named PIL
Then in PowerShell, run the following command:
pip install Pillow
- Convert mbtiles format to sqlitedb (suitable for OsmAnd and RMaps)
You will find the Python scrip mbtiles2osmand.py on GitHub. Download it to your work folder and run Command Prompt or PowerShell.
Usage:
python3_ mbtiles2osmand.py [-h][-f] [--jpg JPEG_QUALITY] input output
Positional arguments:
input input file
output output file
Optional arguments:
-h, --help show this help message and exit
-f, -force override output file if exists
--jpg JPEG_QUALITY convert tiles to JPEG with specified quality
Examples:
Simple:
python3 mbtiles2osmand.py input.mbtiles output.sqlitedb
Converting tiles to jpeg with compression:
python3 mbtiles2osmand.py --jpg 75 input.mbtiles output.sqlitedb
- Copy the .sqlitedb file to OsmAnd
Now you should have a .sqlitedb file ready in your work folder. Copy it to appropriate OsmAnd folder and use it as an main, undelay or overlay. See User guide for more details. Done!
- (OPTIONAL) Unite multiple osmand files into single file
If you need to, you can find the scrip file unite_osmand.py on GitHub. Again - download it to your work folder and run Command Prompt or PowerShell.
Usage:
python3 unite_osmand.py [-h][-f] input [input ...] output
Positional arguments:input input files. If multiple files contain tile with the same coordinates, tile from first (from argument list) file will be used
output output file
Optional arguments:-h, --help show this help message and exit
-f, -force override output file if exists
- EXTRA: Convert A Single GeoPDF To GeoTIFF
If, for whatever reason, should you wish to convert a single geopdf to geotiff, use the gdal_translate command and input your own parameters where denoted by < >. You can use gdal_translate with or without optional parameters. It can take a long time to process and the resulting tiff can be really large especially when including the orthoimagery and shaded terrain. Therefore, it might be a good idea to exclude some of the PDF layers (see second example).
Usage:
gdal_translate <GeoPDF filename> <Output Geotiff Filename> -of gtiff --config
gdal_pdf_layers_off “<pdf layername 1>,<pdf layername 2>,<pdf layername 3>” --config gdal_pdf_dpi <output dpi>
Examples:
Converting pdf with all its layers to a geotiff at default DPI:
gdal_translate geo_sample_map.pdf output_sample_map.tif -of gtiff
Excluding several layers from conversion by gdal_pdf_layers_off parameter followed by list of comma separated layer names. Output file is a geotiff, with specified 600 DPI:
gdal_translate geo_sample_map.pdf output_sample_map.tif -of gtiff --config gdal_pdf_layers_off “Map_Collar, Map_Frame.Projections_and_Grids, Map_Frame.Terrain.Shaded_Relief, Images.Orthoimage” --config gdal_pdf_dpi 600
- Sources:
- Gdal2mbtiles (for reference only),
- How to convert geopdf to geotiff using GDAL,
- See also Making Overlay Maps for OsmAnd on Linux.
Common Issues
OutOfMemoryError issue
Issue: OsmAndMapCreator fails with message - OutOfMemoryError.
The file you try to process with OsmAndMapCreator is too large. Either try to process a smaller file, or increase the memory for OsmAndMapCreator in the .sh or .bat file. The -Xmx parameter specifies how much memory the program can consume. Settings can be different for 64bit (more than 1.5GB) and 32bit (max around 1.5GB) machines.
Empty file issue
Issue: After converting an .osm to .obf with only a POI index, the .obf is empty, although original .osm file did contain POIs.
It could be that a crucial tag was missing for OsmAndMapCreator to recognize a POI when you converted the osm from another source, like Garmin. If a point in the OSM file looks like this:
  <node id='-24' visible='true' lat='1.3094000' lon='103.7784000'>
    <tag k='created_by' v='GPSBabel-1.4.2'/>
    <tag k='name' v='Street-Soccer Court'/>
  </node>
change it to contain an additional 'amenity' tag, like:
  <node id='-24' visible='true' lat='1.3094000' lon='103.7784000'>
    <tag k='created_by' v='GPSBabel-1.4.2'/>
    <tag k='name' v='Street-Soccer Court'/>
    <tag k='amenity' v='point' />
  </node>
Then convert the file using OsmAndMapCreator. You can check on the OSM site what tags are good ones to use and you can also verify which tags are supported by OsmAnd.