Topography
Overview
The Topography plugin is a paid feature of the OsmAnd app.
Topography is an important feature of cartography that provides information to visually assess the terrain's relief. Topography information like Contour lines, Terrain (Hillshade and Slope), and 3D Relief helps to make a visual assessment of the lay of the land by seeing elevation, relief, extremes, steepness, or points of equal height.
Each feature provided by this plugin is an independent map layer that, when enabled, can be displayed above or below the main map source depending on the settings.
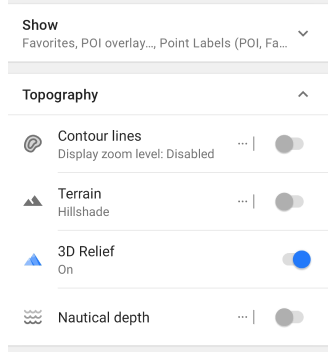
The Topography plugin provides access to the following map types:
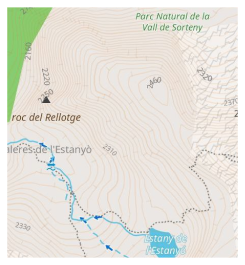
- Contour lines. This is a vector map represented in meters or feet. Contour lines show elevation levels and help visualize the terrain.
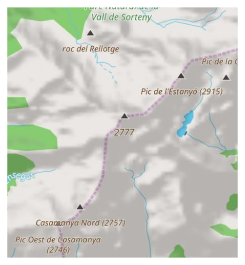
- Hillshade. Types of maps with shading of hills and slopes make the relief more visible and help to visually interpret the terrain.
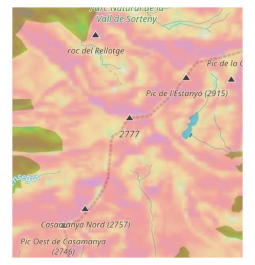
- Slope. Raster layer that provides information about the steepness of slopes, which can be important for route planning and safety.
- 3D Relief. It is a vector map that provides a three-dimensional representation of the terrain, available only with OsmAnd Pro subscription.
- Android
- iOS
License for DEM data used by OsmAnd for terrain detection
The altitude data on the map (between 70 degrees north latitude and 70 degrees south latitude) were obtained from measurements made as a part of the Shuttle Radar Topography Mission (SRTM). It utilized the Advanced Spaceborne Thermal Emission and Reflection Radiometer (ASTER), the primary imaging tool in NASA's Earth Observation System.
For complete information, see the License.
DEM (DSM) data
- MERIT DEM.
- ArcticDEM: Porter, Claire; Morin, Paul; Howat, Ian; Noh, Myoung-Jon; Bates, Brian; Peterman, Kenneth; Keesey, Scott; Schlenk, Matthew; Gardiner, Judith; Tomko, Karen; Willis, Michael; Kelleher, Cole; Cloutier, Michael; Husby, Eric; Foga, Steven; Nakamura, Hitomi; Platson, Melisa; Wethington, Michael, Jr.; Williamson, Cathleen; Bauer, Gregory; Enos, Jeremy; Arnold, Galen; Kramer, William; Becker, Peter; Doshi, Abhijit; D’Souza, Cristelle; Cummins, Pat; Laurier, Fabien; Bojesen, Mikkel, 2018, “ArcticDEM”, Harvard Dataverse, V1.
- Sonny's LiDAR Digital Terrain Models of Europe (DTM).
Setup
To display Contour lines and Terrain (Hillshade, Slope) data on the map:
- Purchase: OsmAnd+, OsmAnd Maps+, or OsmAnd Pro purchase plan
- Enable Topography plugin in the Plugins section of the Main menu.
- Download: Contour lines, Hillshade, Slope, or Terrain map (3D) maps.
- Enable and adjust: Contour lines, Hillshade, or Slope for the map view.
- You can also watch YouTube tutorial.
To display 3D Relief you need to purchase the OsmAnd Pro plan, including access to the Topography plugin.
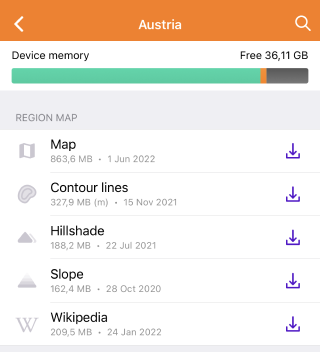
Download Maps
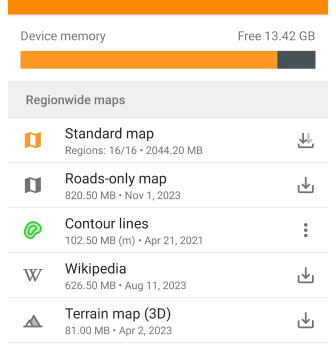
To start working with the plugin functionality, you need to download the maps you are interested in. Some maps, such as Contour Lines for mountainous regions, can be quite large, exceeding 2 GB, and may not be supported on outdated devices.
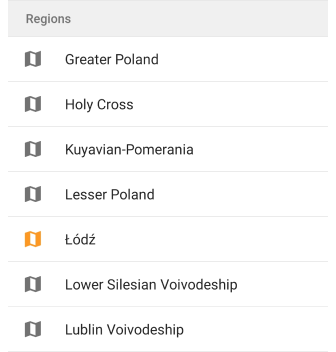
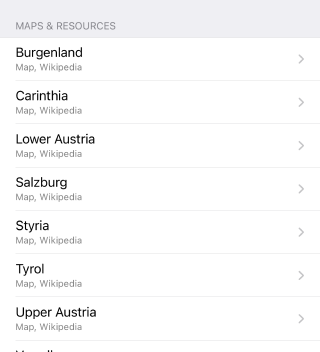
For stable work and to save resources, you can download a map not of the entire country, but of its specific regions, if such regions are offered in the application. Information about the size of each map type is listed under their name.
3D Relief Maps
- Android
- iOS
Menu → Maps & Resources → Regions
Menu → Maps & Resources → Worldwide
You need to download Terrain map (3D) maps to display Hillshade, Slope, and 3D Relief. After downloading maps, you can display Contour lines and Terrain using the Configure map section of the Main menu.
If the map displayed on the screen is not downloaded, then in Menu → Configure map → Topography section → Terrain at the bottom of the list of features the section Download maps with suggested additional maps will be displayed.
Contour Lines (Meters or Feet)
- Android
- iOS
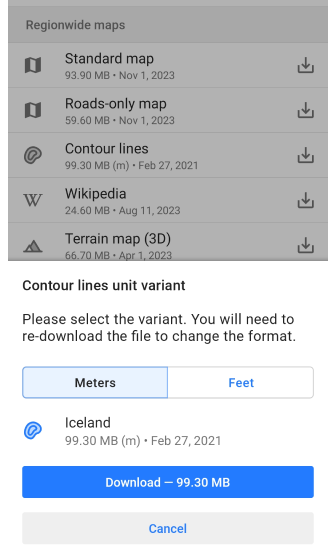
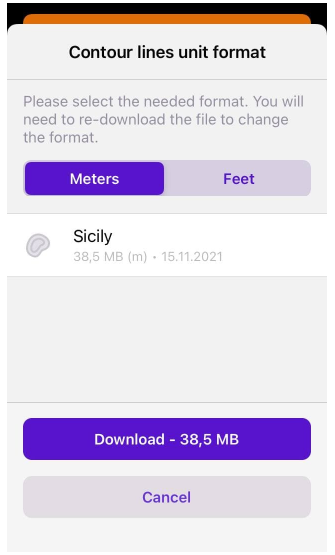
For Contour lines, you need to determine in which units (meters or feet) they will be displayed on the map and download the appropriate version of the map to your device.
The unit options are not interchangeable, so if you need to switch from meters to feet or the reverse, you are required to uninstall the previous version of the Contour lines map to download the new version.
Contour Lines
- Android
- iOS
Menu → Configure map → Topography → Contour lines
Menu → Configure map → Topography → Contour lines
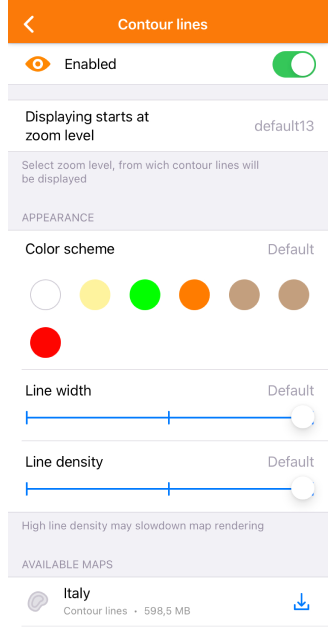
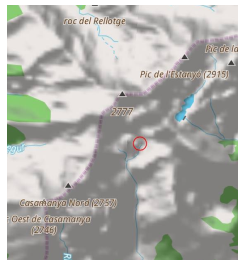
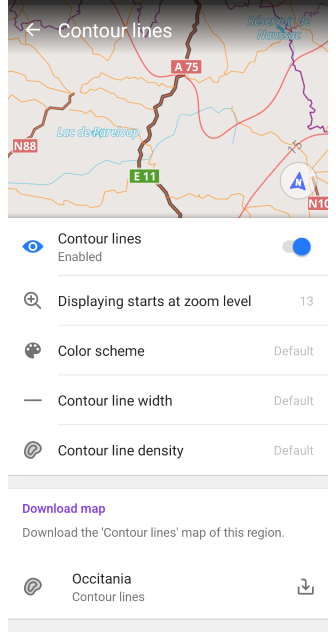
Contour lines are a graphical representation of elevations on a map and are available as vector maps. They form lines corresponding to points with the same altitude, which form contours that allow you to determine in which direction and how much the surface slopes. Specific features:
- When you use the Map rendering engine Version 2 (OpenGL), Contour lines are displayed in both 3D view and 3D relief mode.
- When you use the Map rendering engine Version 1, if the map source is any tile map from the Internet, displaying Contour lines is not supported.
Appearance settings:
- Contour lines. Toggle on/off whether to display or hide Contour Lines on the map.
- Displaying starts at zoom level. Minimum and maximum zoom level at which Contour lines are visible on the map.
- Color scheme. Selection of the color by which Сontour lines are displayed on the map.
- Contour line width. Selection of width options for displaying Contour lines on the map.
- Contour line density. Selection of options for the density of Contour lines displayed on the map: Low, Medium, High. At higher densities, the map is loaded more slowly.
- Maps & Resources. Displays contour line maps for the selected area and nearby regions relative to the current map center, which can be downloaded.
Terrain
- Android
- iOS
Menu → Configure map → Topography → Terrain
Menu → Configure map → Topography → Terrain
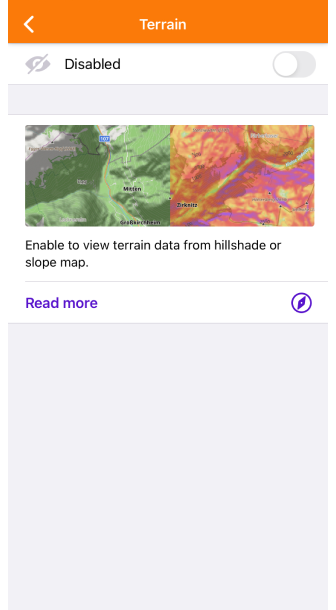
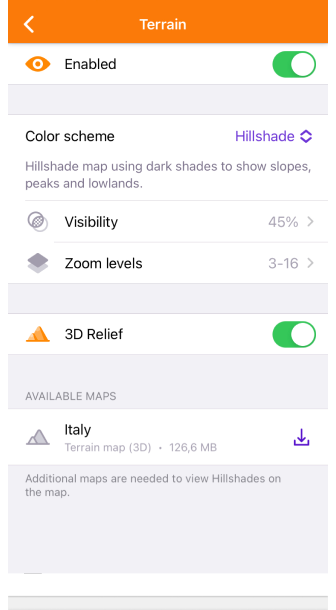
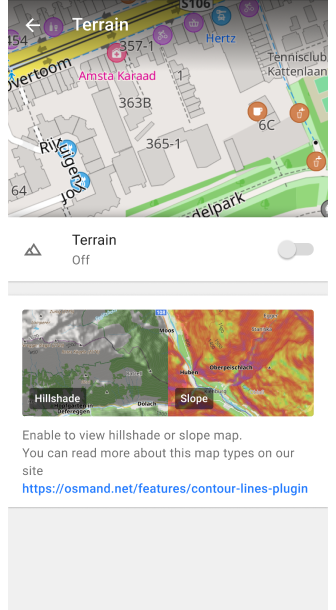
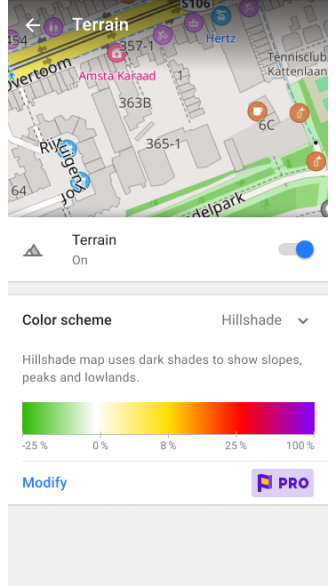
The Terrain option enables and allows you to customize three features such as Hillshade, Slope, and Altitude.
Specific features:
- Only one option can be enabled at the same time, either Hillshade, Slope, or Altitude.
- If you do not see any changes after downloading and enabling the corresponding map, it is recommended to restart the application.
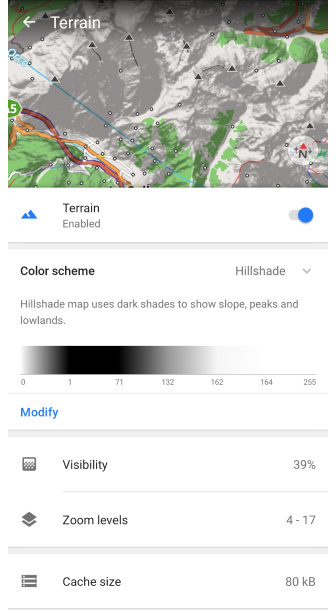
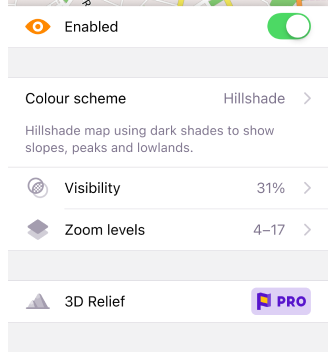
The Terrain menu includes color scheme selection with the option to modify it (for Pro subscribers), the ability to change the transparency of the layer on the map (visibility), and select the zoom level for its display, information about the size of cached data, and a list of maps needed to display the layer.
Hillshade, Slope and Altitude Layers
| Hillshade | Slope | Altitude |
|---|---|---|
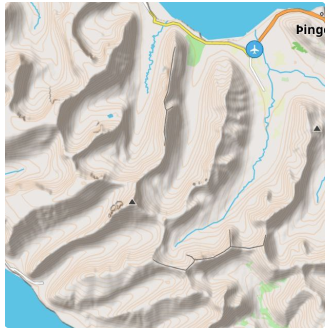 |  | |
Hillshade is based on simulating surface lighting using terrain data. This method involves creating shadows and highlights based on the angle of the surface relative to the light source. As a result, you see natural hills, valleys, and other terrain details on the map.
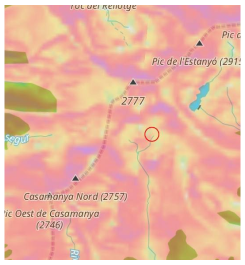
Slope determines the surface slope angle based on the elevation data of points on the map. Slope angle calculations are performed considering changes in elevation and distances between points, and representing this change as a slope angle.
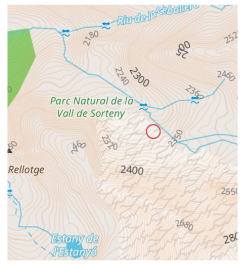
Altitude represents the elevation of points on the map relative to sea level. It helps you understand how the terrain changes in height. This feature is particularly useful for activities such as hiking or mountain biking, where knowing the altitude can assist in planning routes and managing physical exertion. Altitude data is derived from elevation models and provides a clear view of high and low points, making it easier to assess the difficulty of a route or identify peaks and valleys along your journey.
Hillshade, Slope, and Altitude raster maps are created based on raster terrain data such as Digital Elevation Models (DEM).
Usage:
- Navigation. Helps identify steep slopes, both downhill and uphill, which can be crucial for safe navigation.
- Plan routes. Helps to choose the most suitable routes, considering the terrain.
- Terrain estimation. It's convenient for visualizing the landscape, especially if you're walking or biking.
Default Color Scheme
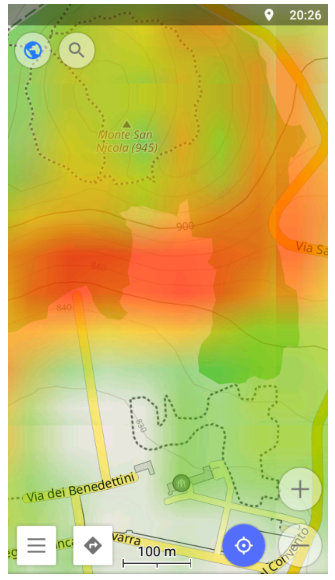
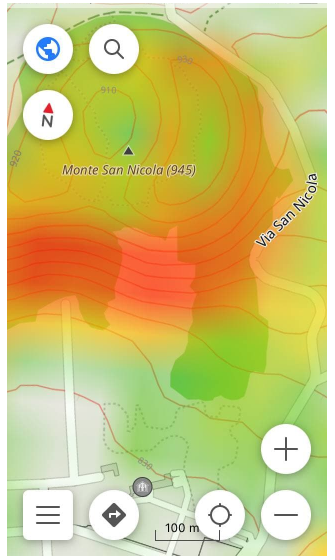
| Hillshade | Slope | Altitude |
|---|---|---|
 |  |  |
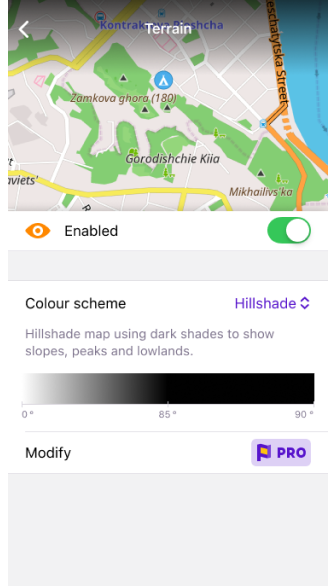
Hillshade uses dark shades to show slopes, peaks, and lowlands. Virtual Sun has a fixed azimuth (direction) of 315 degrees.
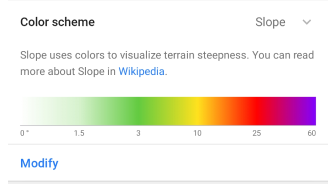
Slope uses color to visualize the steepness of the terrain. You can read more about it here. Each color corresponds to an angle of deviation from the horizontal. An additional Slope color scheme, Avalanche, is available in the Modify menu.
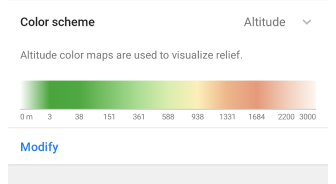
Altitude. Altitude map colors each pixel according to calculated map height using the gradient from a defined color scheme. Usually, altitude schemes are very dependent on location. In mountain areas you would prefer to distribute colors to a wider altitude range and in flat areas, you would select a color scheme with a small range between min/max altitude.
Modify Color Scheme
- Android
- iOS
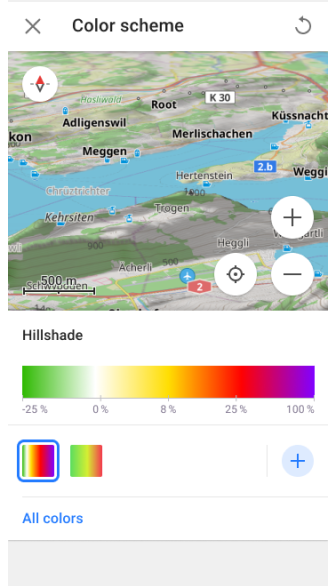
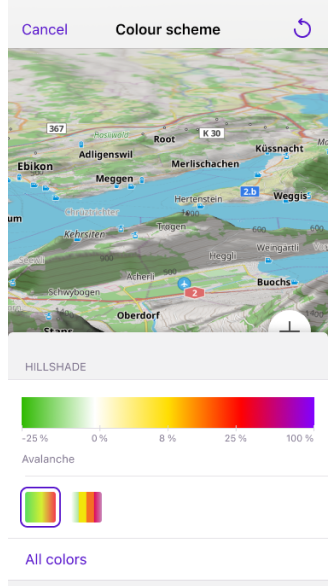
This Pro feature allows you to select from a predefined list of color schemes or import custom schemes created on a PC. You can edit these palettes to personalize the appearance of maps and routes. Custom color palette files can be easily added to OsmAnd using the import/export tool.
Visibility
| Visibility 31% | Visibility 74% |
|---|---|
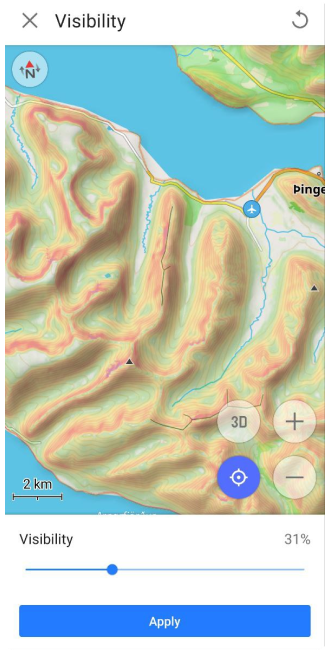 | 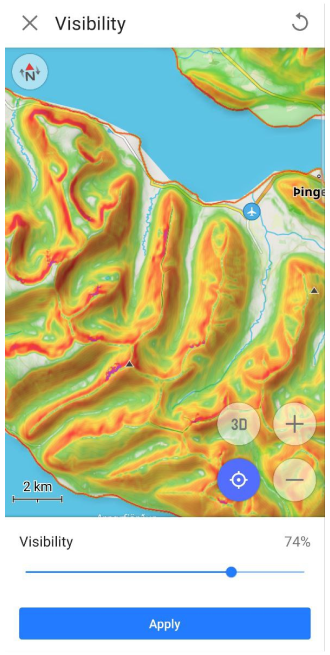 |
The Visibility function is used to adjust the transparency of the shadows for Hillshade and the colors used for representing the angle in the Slope parameter.
Zoom Levels
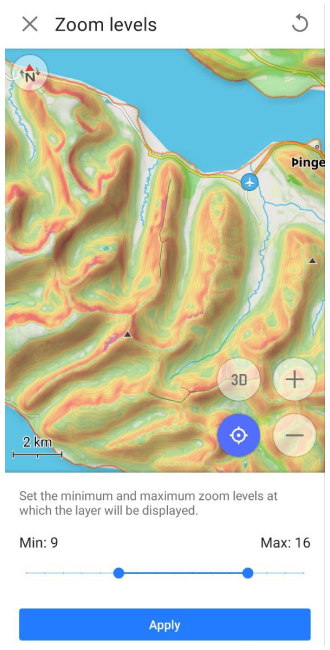
The Scale Levels function allows you to set the minimum and maximum values of map zoom levels, ranging from 4 to 19, at which the Hillshade or Slope map layers will be displayed.
Cache Size
Cache size is an informational section that displays the amount of memory on your device currently used for Terrain data. Each time you view Hillshade or Slope information on a map, all of this data is temporarily stored in the cache for quick access and later use, avoiding additional load on your device's processor.
Clearing the cache is sometimes necessary to free up space on your device or to resolve potential performance issues. To clear the cache you need to go to the System Settings of the device, then the path can be as follows: Applications → OsmAnd → Storage → Clear cache.
Rendering Engine (Android)
Hillshade and Slope are displayed and adjusted in any selected Map rendering engine.
- If you use the Map rendering engine Version 1, you need to use the normal downloading of Hillshade and Slope raster maps.
- If you use the Map rendering engine Version 2 (OpenGL):
- You can continue to use the normal Hillshade and Slope raster map download type. However, to do so, you'll need to activate the OsmAnd development plugin and enable the Use raster SQLite format for hillshade and slope setting.
- Alternatively, you can use the Terrain Map (3D) download. This saves memory space on your device, and the Hillshade, Slope, and 3D Relief effects will be generated from them using your device.
Quick Actions
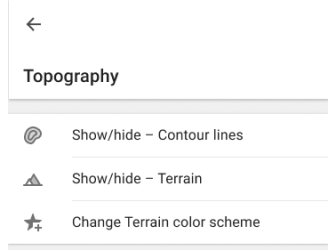
You can use the Quick Action buttons on the map screen to switch the visibility of Contour Lines, Terrain layers, and Terrain color scheme. Depending on the layer selected in the Configure map menu, assigning a Terrain action to the button will display Hillshade, Slope, or Altitude.
The main settings for Show or Hide map types are in the Topography section of the Configure Map menu. In the Quick Action article, you can find a list of layers available for display. If you need quick access to this map configuration, use the Custom Button tool.
- Go to Add action: Menu → Configure screen → Custom buttons → Quick action → Add action → Configure map.
- Add one or more QA buttons to change the visibility of a particular topography layer.
3D Relief
3D Relief is an OsmAnd Pro paid feature  .
.
- Android
- iOS
Menu → Configure map → Topography → 3D Relief
Menu → Configure map → Topography → Terrain → 3D Relief
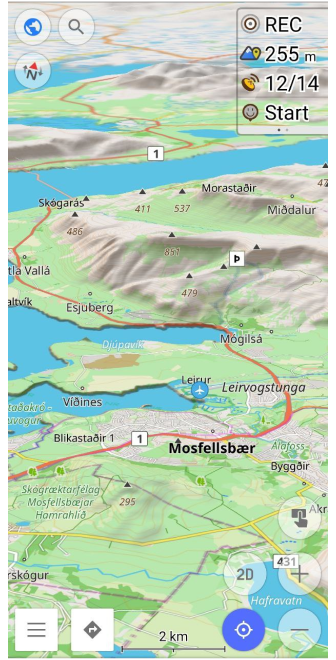
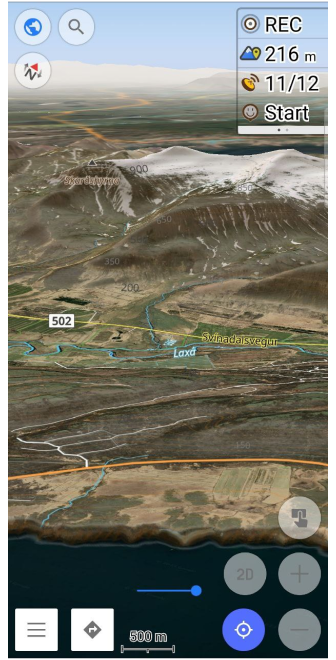
The 3D Relief feature produces a raised relief and provides a three-dimensional representation of the landscape. 3D Relief works offline and can be used with OsmAnd vector maps or any raster maps as a Map Source or as an Underlay/Overlay.
Follow the steps below to display 3D Relief on the OsmAnd map:
- Purchase OsmAnd Pro subscription for iOS or Android.
- Go to Menu → Configure map:
- Android: scroll to Topography section → 3D Relief.
- iOS: scroll to Topography section → Terrain → 3D Relief.
- Download the Terrain map (3D) of the regions, if necessary.
- Android
- iOS
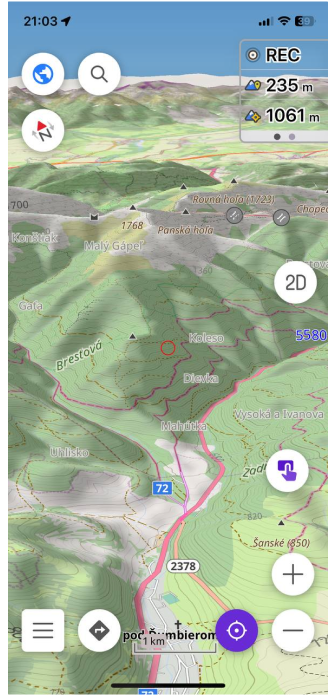
| Vector map layer | Raster map layer |
|---|---|
 |  |
| Vector map layer | Raster map layer |
|---|---|
 | 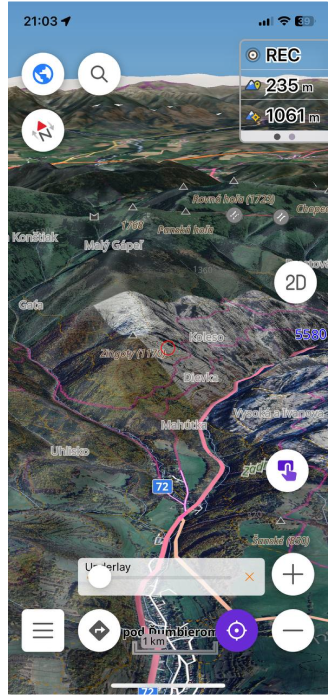 |
Vertical Exaggeration
- Android
- iOS
Menu → Configure map → Topography → 3D Relief → Vertical exaggeration
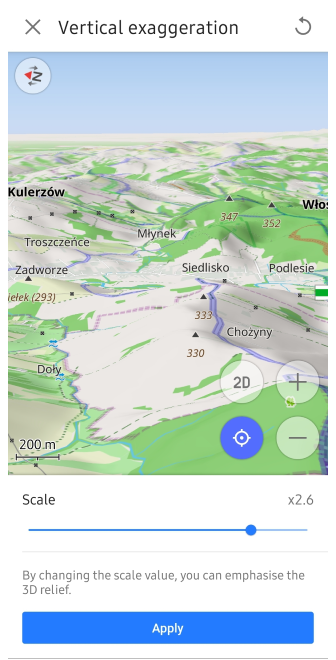
Menu → Configure map → Topography → Terrain → 3D Relief → Vertical exaggeration
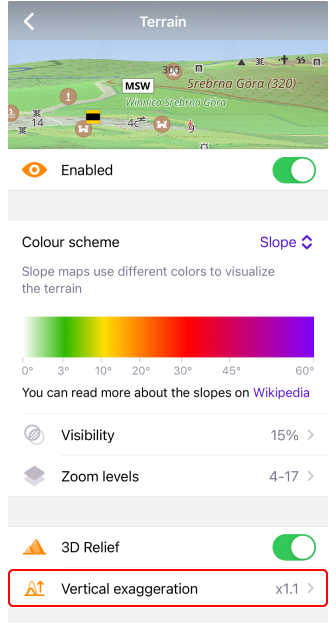
Vertical exaggeration is a special coefficient for 3D relief. You can change the scale (Vertical exaggeration) from x1 to x3. This feature allows you to view smoother terrain contours with increased detail.
Hillshade and 3D Relief
| Hillshade | 3D Relief |
|---|---|
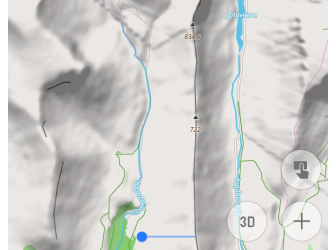 |  |
Hillshade is a type of map that displays terrain using shadows, creating a visual representation of the slope and shape of the earth's surface.
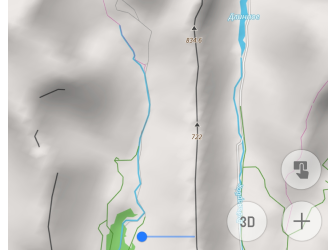
3D Relief is a feature that adds three-dimensional effects to the map.
If you disable Hillshade and enable 3D Relief, relief shadows will still be visible because Hillshade and 3D Relief are two different ways of visualizing a map. Hillshade creates shadows based on the terrain and adds them to the map, while 3D Relief models 3D elements to show the depth and shape of the terrain, and the shadows are part of the visualization. These features can work in parallel, and disabling Hillshade does not affect how 3D effects are displayed.
When Hillshade is enabled, an image with relief shadows appears more detailed, darker, and more stepped than a 3D Relief image. The explanation is that Hillshade emphasizes the gradients and contrasts of the terrain, creating a sharper and more detailed image. The 3D Relief feature gives the map a more fluid and smoothed appearance, softening the terrain and potentially reducing the visibility of some finer details.
Combine Layer Types
- Android
- iOS

OsmAnd allows you to combine multiple types of map layers for a more visual display.
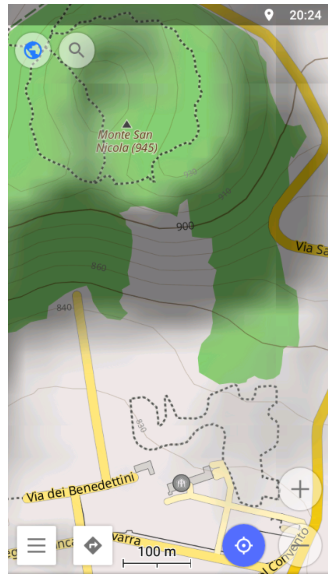
- The combination of Contour lines and Hillshade is optimal for visually and numerically estimating mountain slope steepness.
- The combination of Contour lines and Slope layers is best for estimating slope steepness and finding points with the same height.
- The combination of 3D Relief and Hillshade layers lets you get a more realistic and visual representation of the terrain, relief, and landscape details. This combination is especially suitable for mountainous and hilly terrain.
Related Articles
This article was last updated in August 2024